Splitgraph has been acquired by EDB! Read the blog post.
Accessing private data sources with network tunnels
Use Splitgraph to query and load data from private data sources with built-in support for network tunnels.
What you will build in this guide
time required: 4 minutes
Splitgraph has extensive support for connecting external data sources as long as they can be accessed by Splitgraph Cloud.
What about databases behind firewalls and NAT boxes? There's a simpler option than exporting and uploading CSV files!
In this guide we'll show you how to create a network tunnel between Splitgraph Cloud and a host inside your private network with access to your database. Once the tunnel is set up, you can query or load data with Splitgraph the same way as with a publicly accessible database.
How it works
Similar to how
SSH tunnels and
services like ngrok work, the sgr command line tool
provides a handy tunnel feature
which works with over a dozen databases.
Each tunnel connects a local host-port pair, such as 192.168.0.100:5432 or
localhost:3306 with a private IP6 address only accessible to Splitgraph, e.g.
fd71:5f64:7628:51cb:7884:f261:0ab5:7b52:31337.
As long as the tunnel is active, Splitgraph can query the private database just like it would any globally-accessible data source. Since only Splitgraph can access the private tunnel address, script kiddies trying to connect to random IP addresses will never stumble upon your private database!
Prerequisites
If the sgr commandline tool isn't installed yet, you can follow the
installation instructions in the
Stripe jumpstart guide.
This guide assumes there's a private data source which must be accessed from Splitgraph Cloud. If you don't have an existing private database, running PostgreSQL locally is a simple and free solution.
Tunnel Scenario 1: One-time import
Establishing the tunnel
Suppose your private PostgreSQL database listening on localhost:5432 has some
data you'd like to import into Splitgraph. If sgr is installed, then
establishing a tunnel is as simple as running sgr cloud tunnel localhost:5432:
> sgr cloud tunnel localhost:5432
To connect to localhost:5432 from Splitgraph, use the following connection parameters:
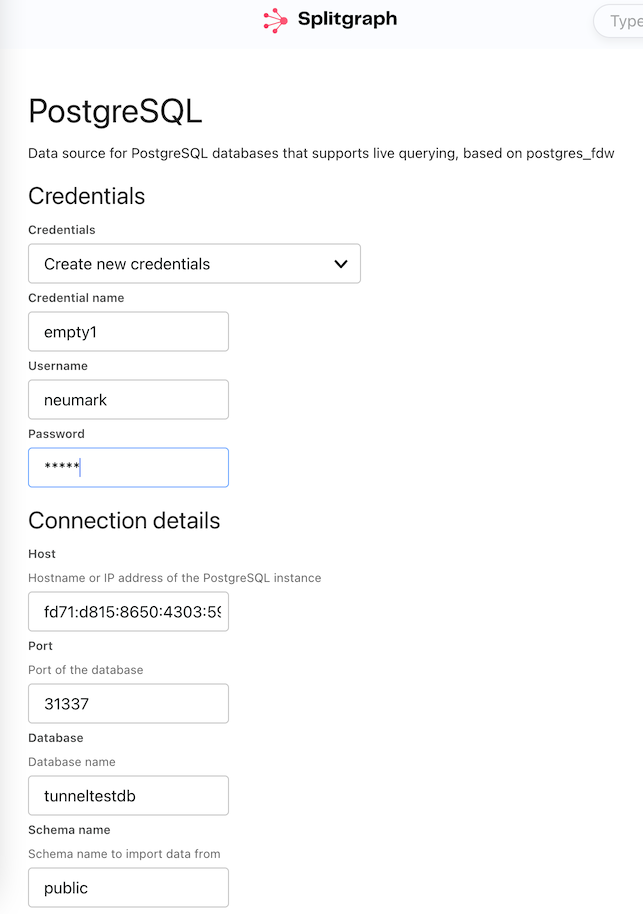
Host: fd71:d815:8650:4303:5999:56fd:92d1:2358
Port: 31337
launching rathole client
Sep 23 17:04:20.469 INFO config_watcher{path="/Users/neumark/.splitgraph/rathole-client.toml"}: rathole::config_watcher: Start watching the config
Sep 23 17:04:20.478 INFO handle{service=fd71:d815:8650:4303:5999:56fd:92d1:2358}: rathole::client: Starting 2cc90fa04f273b1ba8bf09e6e0749114369c5661b6a8f2f5b2e37d2836ed4f20
Sep 23 17:04:20.826 INFO handle{service=fd71:d815:8650:4303:5999:56fd:92d1:2358}:run: rathole::client: Control channel established
As shown above, sgr prints the private IP6 address and port of the tunnel.
Creating the repository
Start the
PostgreSQL connection wizard
by clicking "Connect External Data" on the Dashboard page, then fill out the
form using the host and port values provided by sgr:
After clicking the "Continue" button at the bottom of the screen, you should see the second screen with a preview of your data:
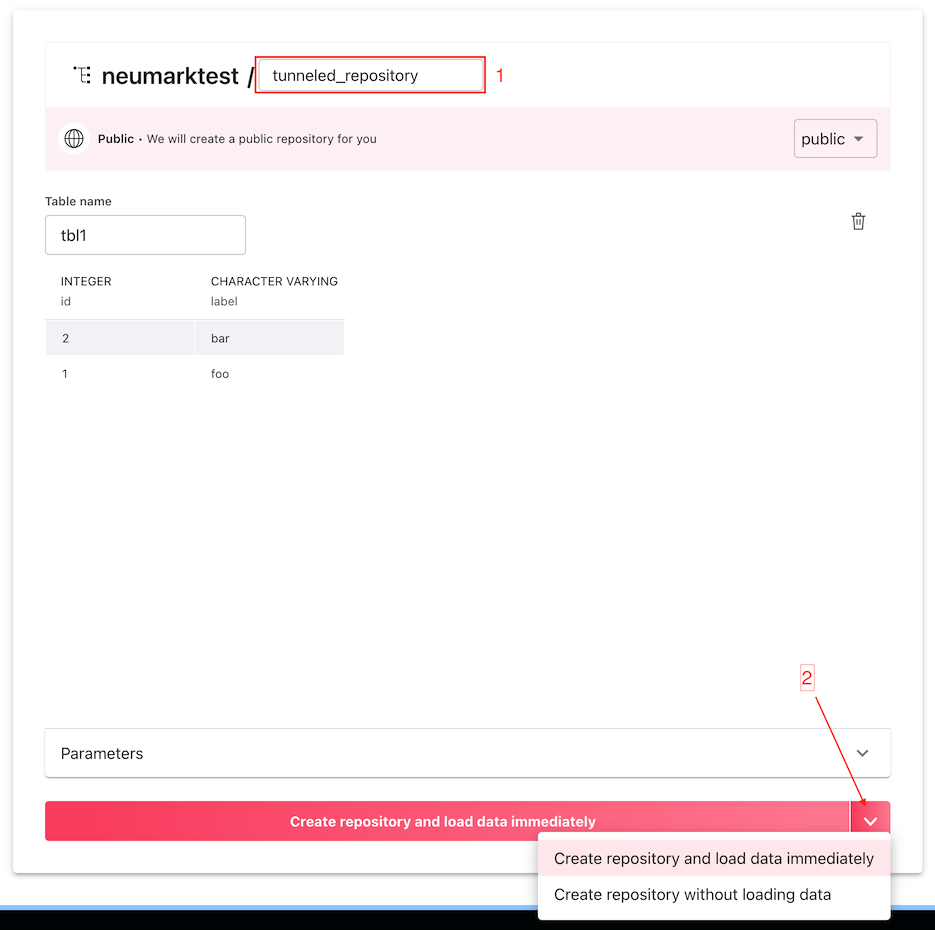
First, select a name for your new repository. Second, click the "Create repository and load data immediately" button.
This will create a new data image populated with the contents of your private
database. The tunnel is no longer needed, it's safe to terminate the
sgr cloud tunnel process.
Instead of choosing "Create repository and load data immediately" in the second step of the wizard, clicking the chevron displays a menu with another option: "Create repository without loading data". Choose this alternative to create a temporary repository first, then import the contents of the private database after potentially transforming the data using the writable DDN.
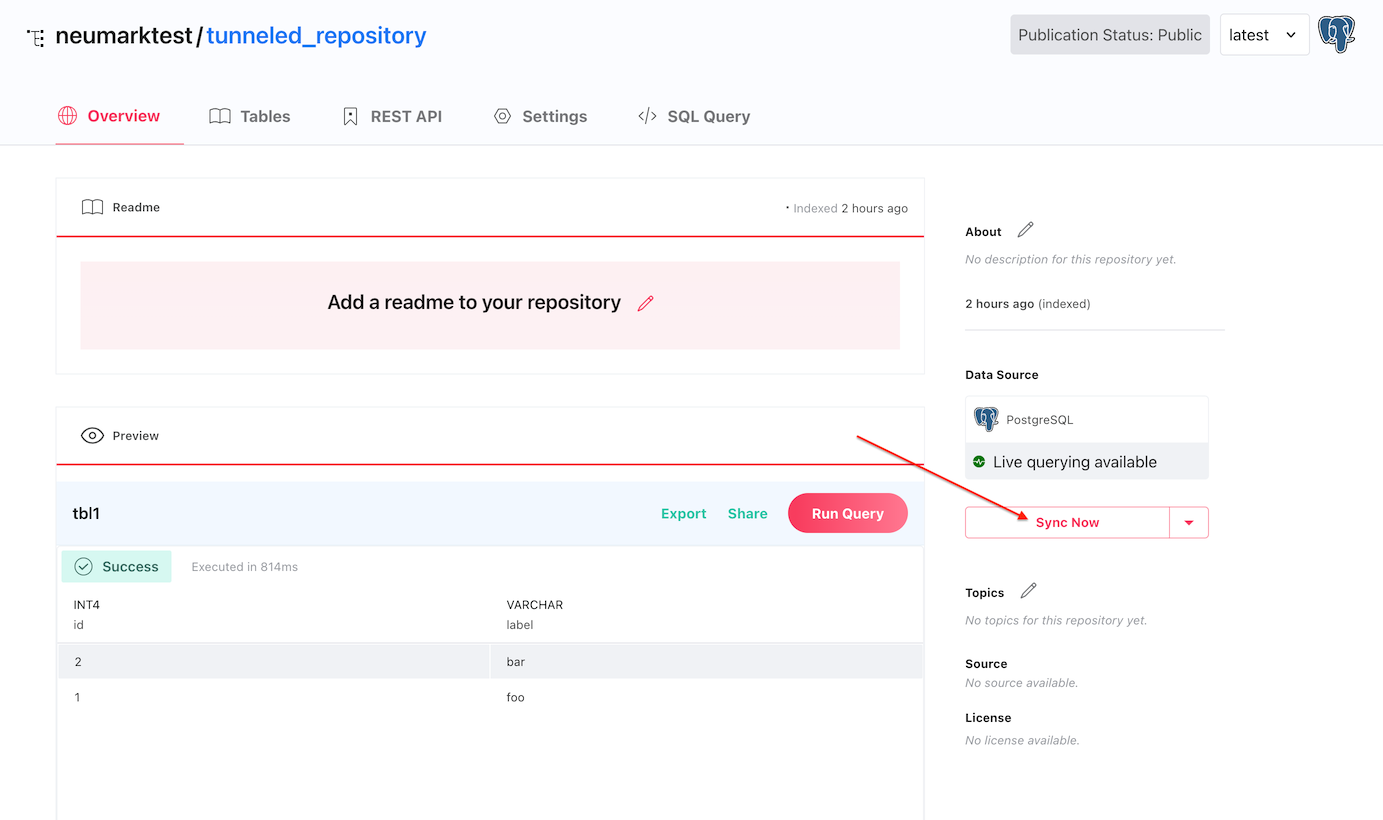
If the repository was created without loading data, it takes only a single click on the "Sync Now" button on the repository page to import the contents of the database later.
Tunnel Scenario 2: Persistent tunneled repository
Temporary tunnels are great for importing data into splitgraph either directly
or using a CREATE TABLE ... AS (SELECT ...) query.
For private databases with frequently changing data, however, it makes most sense to live query from Splitgraph through the tunnel.
Let's start with a splitgraph.yml repository definition:
repositories:
  - external:
      credential_id: d3946c85-396e-428c-99c0-d165e4952755
      params:
        dbname: my_db
        fetch_size: 10000
        host: 127.0.0.1 # use local host address
        port: 5432 # and port
        remote_schema: public
        use_remote_estimate: false
      plugin: postgres_fdw
      schedule: null
      tunnel: true # be sure to add tunnel: true
      tables:
        tbl1:
          options:
            schema_name: public
            table_name: tbl1
          schema:
            - name: id
              type: integer
            - name: label
              type: character varying
    metadata:
      description: null
      extra_metadata: null
      license: null
      readme:
        text: null
      sources: null
      topics: []
    namespace: neumarktest
    repository: tunneled_repository
Note the tunnel: true field of the repositories.external object! To create
the repository described in the YAML file, run:
sgr cloud load -f splitgraph.yml neumarktest/tunneled_repository
Once the repository has been created, the tunnel can be started with:
sgr cloud tunnel -f splitgraph.yml neumarktest/tunneled_repository localhost:5432
The advantage of this approach is that the tunnel can be re-established, even
from a different host with access to the private database, as long as sgr is
signed in as a user with administrative rights on the repository.
The disadvantage is that since there is no tunnel for Splitgraph to connect to
the private database at repository creation time, the table schema has to be
explicitly listed in splitgraph.yml. Fortunately there's a workaround to get
the best of both worlds!
Tunnel Scenario 3: Converting a temporary tunneled repository to persistent
Using the external data wizard (as in Scenario 1) is more convenient than
writing the splitgraph.yml by hand, but the resulting repository's tunnel
can't be restarted later. Fortunately, we can convert the a repository created
with the wizard to one with a persistent tunnel using the following steps:
Create the tunneled external repository just like in Scenario 1. Once the repository has been created, it is safe to terminate the temporary tunnel.
Generate a
splitgraph.ymlfile withsgr cloud dump,sgr cloud dump -f splitgraph.yml neumarktest/tunneled_repositoryEdit the generated
splitgraph.ymland save it assplitgraph_updated.yml, addingtunnel: true.If the
yqutility is installed, the following command createssplitgraph_updated.ymlcontaining the necessary changes:cat splitgraph.yml | yq '.repositories[0].external += {"tunnel":true}' > splitgraph_updated.ymlApply the newly created
splitgraph_updated.yml:sgr cloud load -f splitgraph_updated.yml neumarktest/tunneled_repositoryAt this point the repository has been converted and the tunnel can be restarted with:
sgr cloud tunnel -f splitgraph_updated.yml neumarktest/tunneled_repository localhost:5432
Get back to us!
Hope you find the tunnel feature useful! Did you run into any issues? If you can't live without it or can't get it to work, either way let us know!
Splitgraph
Made with


on four continents.